
If you are interested in making things you tend to accumulate “stuff”.
Sometimes it is tools, sometimes it is raw material, sometimes it is just broken things that were once so useful you can’t bring yourself to throw them away.
The end result is a “Room of doom”. A place where things go, but never come out. Useful things that will never be found again, never fulfil their potential. A wasted room, a space you can’t use.
I’ve recently cleared mine out and organised it as a pleasant making space. It has been a hard and lengthy task, but thoroughly worthwhile. It seems that I think better and I’m much more productive and creative if I’m in a nice environment.
When I started doing it, I wrote a list of things I wanted from the space. The first thing on the list was “It must not seem like a dreary shed”.
The room is about 11’6″ by 13’4″ (3.5 m x 4 m), so it would be quite a large bedroom in a modern home, but it is the smaller of the two bedrooms in my 1850’s terraced house.
So, on with the tour!

The first area is a great big workbench.
The first area is a great big workbench.
The workbench itself is a 3 metre solid wood kitchen worktop from B&Q. It has had a couple of coats of worktop oil to protect it a bit, but the idea is to consider it a consumable. It looks nice, is strong enough not to droop (like the laminated chipboard ones do) and I can replace it every year or two if it starts to look shabby. It is supported on a series of 300mm wide kitchen units. I didn’t put the legs on (as I prefer a lower working height) and I reinforced the units by screwing spare shelving as solid backs. It is sturdy, but I would be cautious of pounding metal on it. I’d probably do that outside anyhow – to save the neighbours distress.
I’ve not chosen a permanent position for the vice yet. Wherever I put it will get in the way, and I’m unsure if it should be at one end or in the middle. I’ll just keep moving it out of the way and once it has stopped getting in the way I’ll bolt it down and make use of it.
It’s wonderful having tools within easy reach. In the past I would either have to spend hours looking for something or I’d nip across the road and buy a new one from the cheap shop across the road. Make a tool board and put your tools on it. It is far far better than having lots of toolboxes to rummage through.
Speaking of toolboxes… the kitchen units provide really good storage for my toolboxes full of surplus low quality tools. The space under the worktop is great for storing crates full of rubbish. The intention is that the blue crates on the left will each house a project and the larger transparent crates will house supplies. At the moment they are all full of really useful things that I can’t find a place for and can’t throw away yet.
The pillar drill is a cheap Chinese one, bought in the 1990’s that has great sentimental value. I think I paid £30 for it.
The blue thing on the extreme right is a Dyson cordless vacuum cleaner. Get one. It is great for just shifting all the dust and mess that accumulates. I’ve not managed to break it yet (and I don’t think you can have a higher recommendation than that).

The sofa area
Under the window is a Sofa bed. It folds down flat to make a full sized single bed. On the right is racking for the power tools that I don’t use particularly often. It’s nice to have them out on display and I am more likely to use them as they are not boxed up under a mountain of rubbish.
From the top there is a compound saw, a small table saw, a scroll saw (which I will probably replace with a band-saw at some point). Then in cases at the bottom, my corded power drill, sander, router, and Jigsaw.
The sofa bed is quite comfy to sprawl on while thinking and helps keep visitors out of the way. Think of it as a spectator filing system. I’ll probably use the space under it for storing sheet materials – plywood, plastic, cardboard etc. that get used in the laser.

This area is almost a mini FabLab in itself.
The biggest chunk is the 50w laser with 600mm x 400mm working area. It is a big upgrade from my previous A4 desktop laser and I love it to bits. It did however nearly kill me getting it upstairs on my own. Miraculously it even remained in perfect alignment after being bounced around.
Above that is a shelf with my Prusa Mendel (which I must start using again), Proxxon MF70 mini mill (which I must do a CNC conversion on to use it for isolation milling PCBs), a Micro Lathe (ideal for making RepRap extruders and similar small jobs) and the PC that drives the laser.
The intention is to use the shelf above for spools of plastic for the 3D printer. A converted toaster oven for SMD reflow soldering (and maybe one with a built in coffee maker…)
The silver ammo box contains raw materials for the laser, but I’ll have to come up with a neater solution.
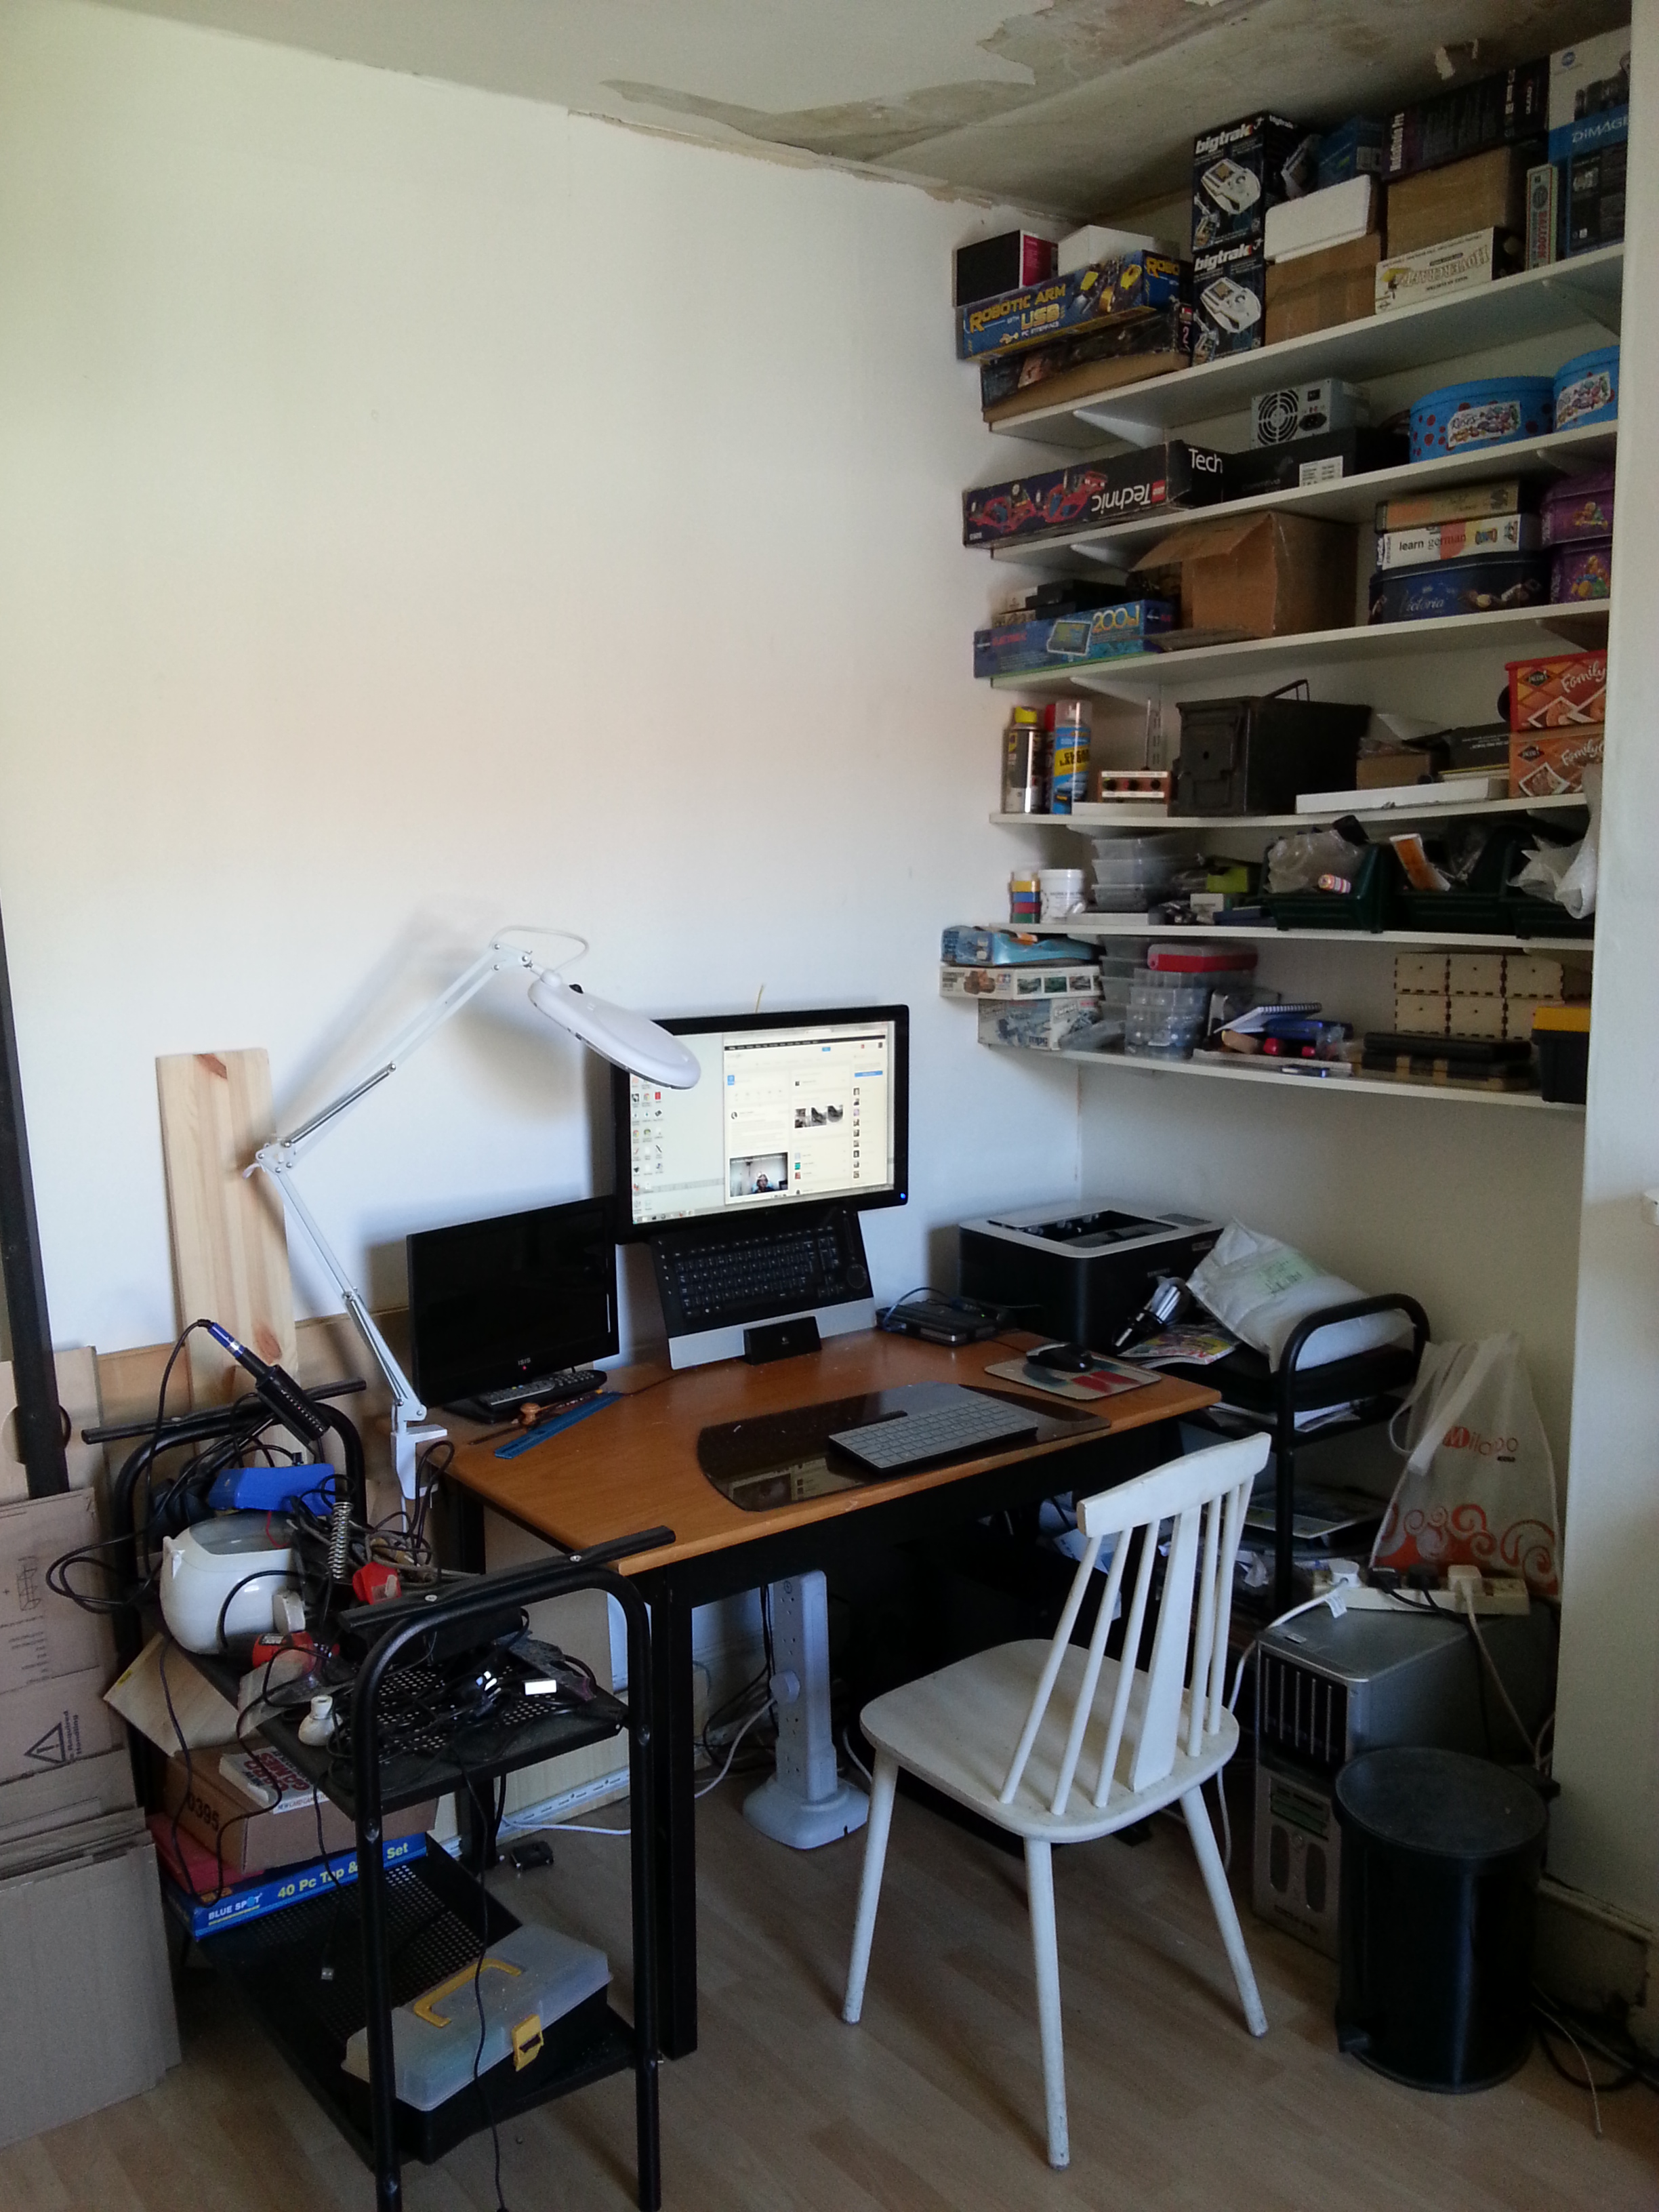
Electronics and computing
The final area is for fine detail work – electronics assembly and some computing. It still needs the most work, particularly as it is the place where I seem to spend the most time. One of the key ideas is that I should be able to just pull the table out into the middle of the room if I need extra space to work on things or if I need to get around all sides of something (like when I’m sewing, for instance). That’s why the monitor is wall mounted, but the whole area seems to accumulate “things” so quickly that I think it’ll be futile.
Oh, and the lamp deserves a mention. It’s got a lovely daylight bulb and a huge magnifier which means I don’t feel quite so old when trying to read tiny part numbers from electronic components.
So, there you are. A workshop (that almost meets the MIT definition of a FabLab) in 3.5m x 4m and doesn’t feel like a dreary shed.
Or, looking at it another way, it’s what you should do with that room full of junk that you keep meaning to clear out!