I’ve recently started doing a bit of welding. I’ve made a couple of dragon heads. Why would I do that….
Some time ago I saw a simple flux core welder in my local Lidl supermarket. It was basic, very cheap (£80) and quite tempting. I read the reviews/guidance on a bunch of welding forums, all of which said, “Don’t buy a cheap supermarket welder and expect to get good results”. Advice seen, heard, understood, noted. So I bought one.
I used it a little, more to test than anything and produced some quite unsatisfactory welds on random bits of unknown metal. Fair enough, so I put it to one side for a year or so.
Then Covid happened. My employer furloughed me for a couple of three week blocks. This was lovely, I got so much done and one of those things was to make some shelves.

You see those shelves, they look like they have always been there. They are actually a fairly recent addition. Previously we had two gaps which filled up with dust, cat hair and general fluff. Unpleasant.
The shelves have a steel frame, welded together. Each frame has a different layout of feet to avoid various pipes and cables. If you look on the bottom right you can see that an oil shut off tap is right where you would want to put a foot. So there is a dog-leg.
I welded those frames together with my supermarket welder. This isn’t a big job, it’s very basic and with no formal training I was able to splatter enough weld onto the box section steel to make frames that didn’t fall apart when I cautiously tapped them with a hammer.
However, I knew that I wasn’t “doing it right” and thought I’d better use some of my new found free time to learn properly. So I cut up some chunks of metal and started sticking them together again. Watched a bunch of videos, generally got bored making test pieces.
Instead of giving up, I got inspired. I watched a number of videos by Joshua de Lisle one of which was creating a horses head sculpture. This had a link to an etsy shop where you can buy the plans to construct your own.
I quite fancied having a go at this, but thought the project was a bit big for my skill level.
So googling around I found this absolutely lovely Wintercroft.com site selling cardboard mask plans and bought the very economically priced Cat Half Mask
I made one out of paper, then transferred the pattern to steel, cut out all the polygons and tried tacking them all together with very little success.
I then tried using the paper mask as a reference and bending the steel to suit, with more success, but still rather less than perfect. My welding was, of course, atrocious and disappointing, but after a bit of grinding…

In my imagination, this was to be perfect – crisp edges, flat planes, incredible mirror shine…
So, while I was pleased I managed to get it together, it didn’t have the aesthetic I wanted, the material (mild steel) wasn’t going to work for me, the welding wasn’t good enough, I couldn’t grind properly in concave areas. etc.
Failure? No. Not at all. I’d made a thing. A wonky ugly thing, not having the correct design intent, but I’d still made a thing.
I thought about why it didn’t work out well and the major lessons to take away were…
- I couldn’t make it as separate polygons as it was beyond my skills to assemble.
- I couldn’t make crisp folds in the 1mm mild steel
- I couldn’t grind the welds pretty in concave areas.
My welds were ugly, blobby tracks of bird crap sprayed on the surface approximately holding things together. This was due to using the wrong process for thin steel – blow through with flux core is always highlighted as a problem when working with thin stuff. Meaning you can’t really get things hot enough to flow nicely.
So if that’s how my welds are going to look (and I’m not going to be able to grind half of them) can I make something where this matters less. Something scaly and reptillian, something old and knarled, something that reeks of old age and time. How about a DRAGON
I wanted very polygon to be outlined with weld, so I thought I would cut the pieces on the bandsaw and where each polygon was connected I would almost cut all the way through but leave a little tab in the middle. That way I could easily fold by hand and only have to deal with fitting the larger sub assemblies together.
Half a day cutting and sticking templates to some sheet metal, then an age of deafening screeches cutting them out on the bandsaw and I had parts to assemble. It took me a day to get them roughly tacked together, then another day to weld them.

I really loved the look of it. My atrocious blobby welds really added to the reptilian look. I liked the sharp dangerous look of it. The scale was perfect – big enough to be impressive but small enough to be displayable.
I wanted some sort of finish on it, but something natural and old. I could see where the heat of welding had burned away protective oils from the steel. I liked that and wanted to enhance that look with something natural.
So I left it outside for three weeks.
It rusted – more rust closer to the welds, less in the centre of the polygons.

Obviously I didn’t want the thing to rust away completely, so I sprayed it in varnish to stop the rusting process. The general idea was to mount a couple of IR lamps in the eye socksts and have a security camera looking out through the mouth. A pan and tilt mount was another potential idea, along with…
Anyhow… This is all good. I made a thing, I was really impressed with myself, very happy with what I’d made.
Now, there is a thing about the internet. Everyone else can do everything better than you can. This applies double to welding. I’ve had so much criticism of my atrocious welding.
- It’s awful (yes, I know it is).
- I’m using the wrong process (yes, I know I am).
- I’m using the wrong welder (yes, I know I am).
- I’ll never get good results doing it that way (I’m quite happy with the overall look)
A big part of this project was to accept and work within limitations. I explicitly didn’t want to go out and spend all the money. I didn’t want to be the chap with all the gear but no idea. Maybe once I’ve done some useful stuff making atrocious welds with my crappy toy supermarket discount welder I can graduate to something nicer and I’ll probably appreciate the results all the more.
So, while I was very happy with Dai the Dragon, my parner thought I should make another one – “His and Hers dragons”, so I started with Nerys the Dragonette (all Dragons should have welsh names). Drawing on Wintercroft.com again, they had a Dragon V2 plan, So I cleaned down some 1mm mild steel, glued on some templates and cut them out. Once again I left little tabs between the polygons, but there were still a lot of elements to fix together…

In spite of setting myself on fire…

I did manage to get things mostly tacked together. You can see how much gapping there is. It’s hard to make things join up precisely. The kerf of the cut means it’s not going to be a perfect join, and it’s quite floppy until each of the polygons starts supporting the other.
I’ve still got quite a bit of finishing off, then the rusting and colouring treatment, but it was a fun day blobbing in all the joins…

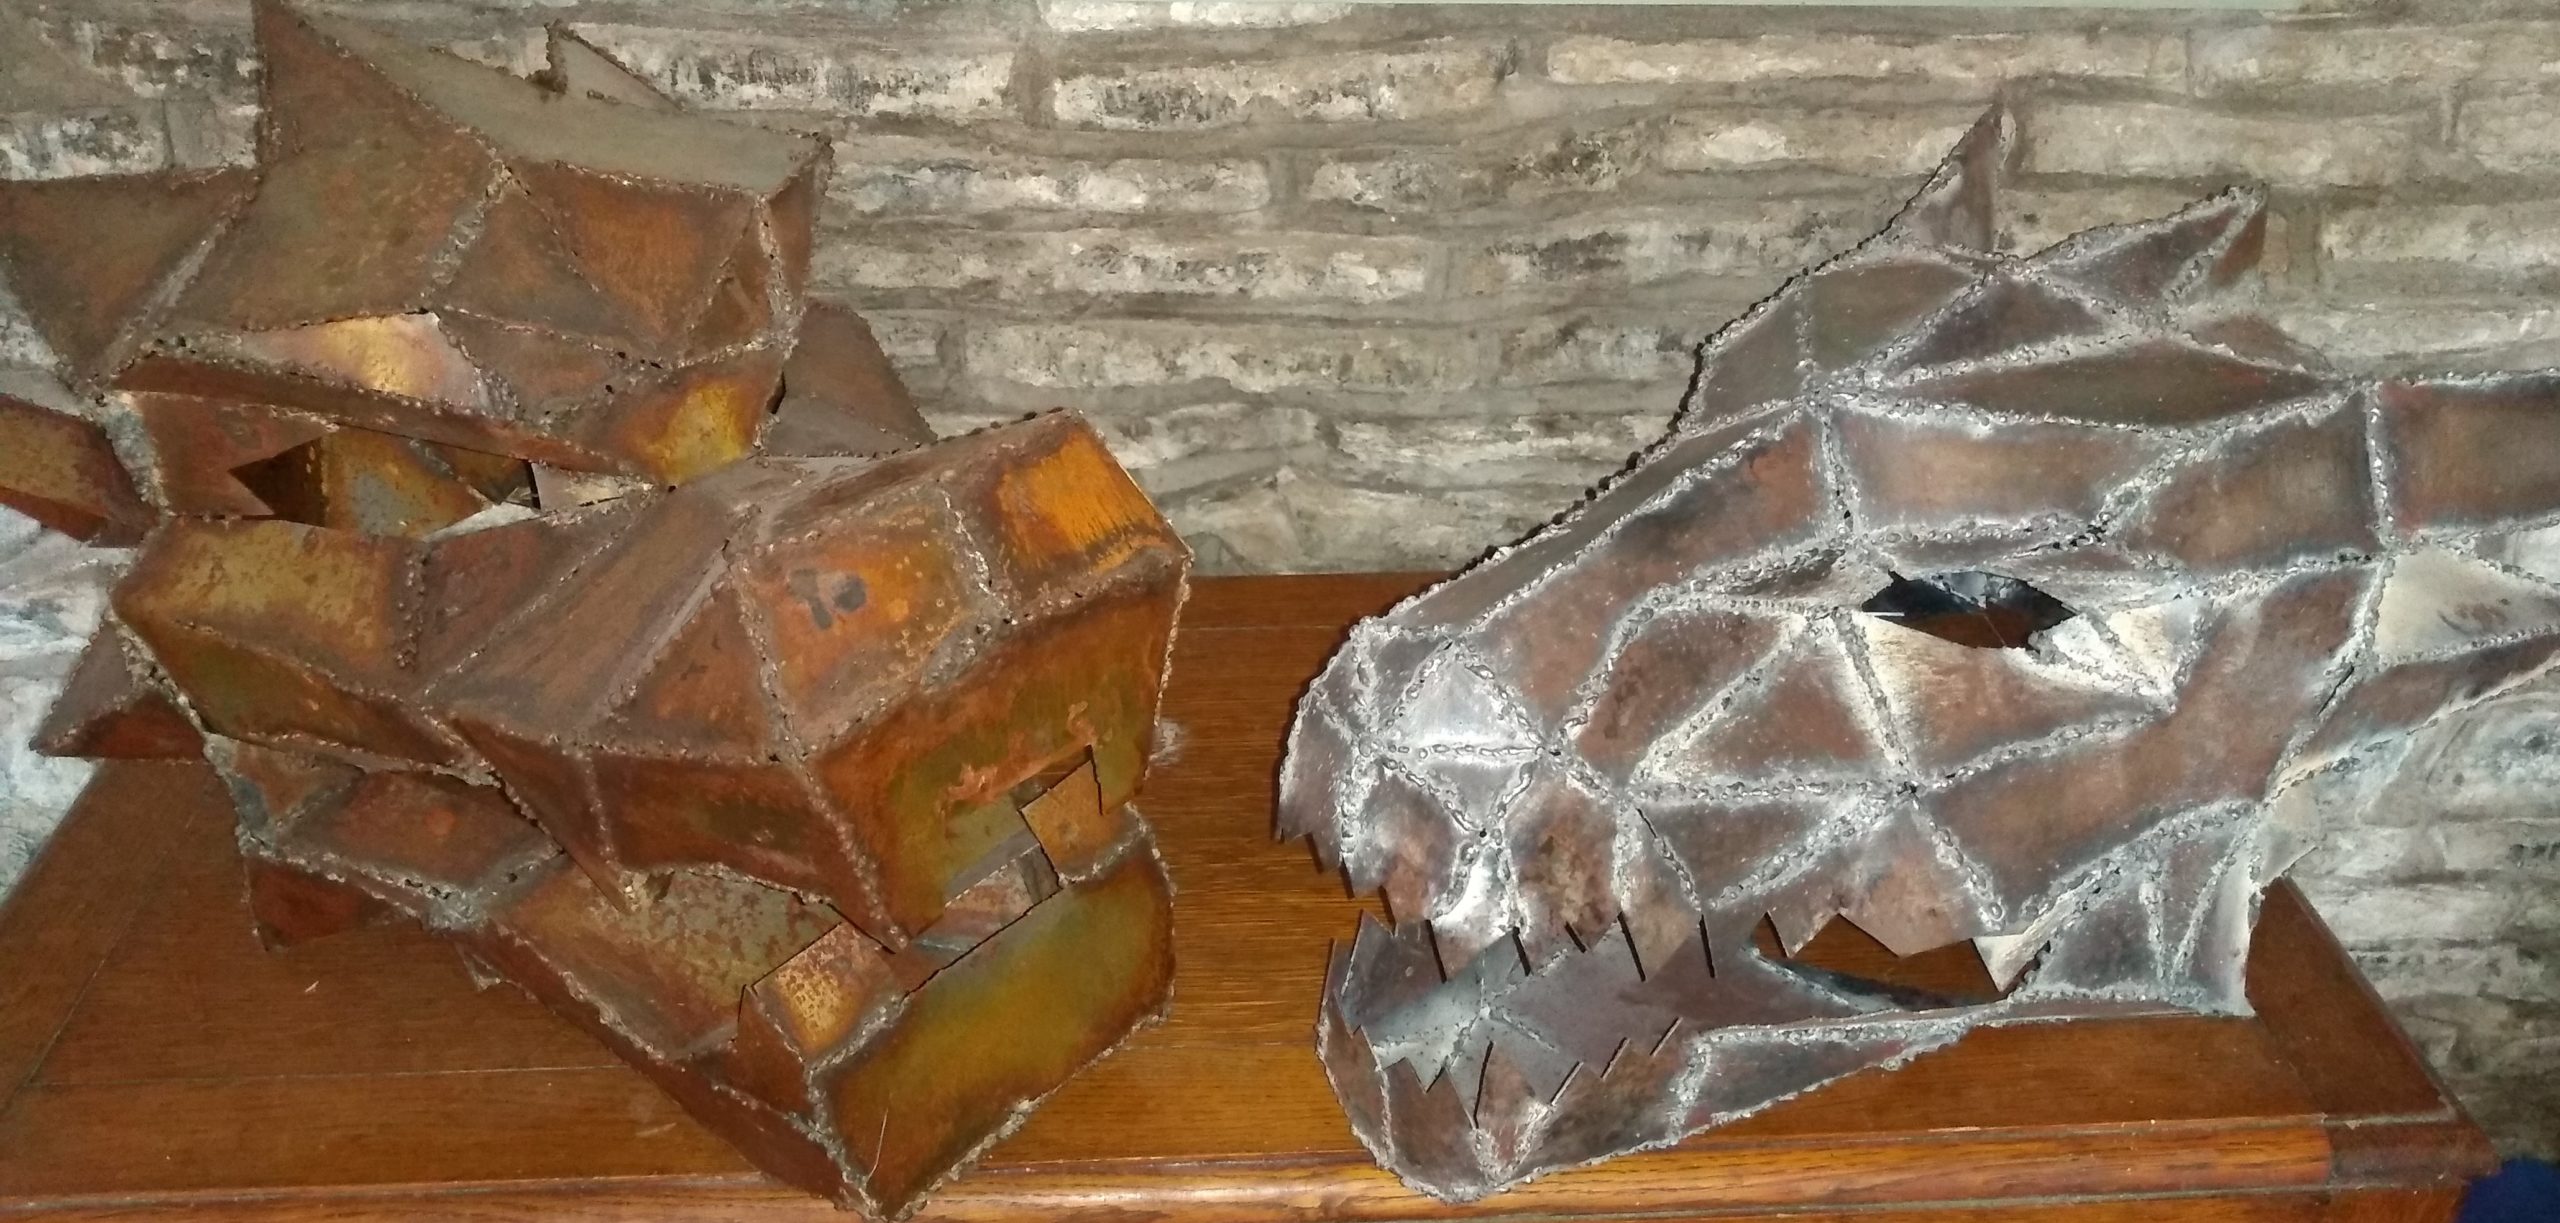
And the final shot of Dai-Nerys Dragarion…

I’m always happy to listen to advice or indeed be told how atrocious my welding is. However, please do include pictures of projects you are proud of. Orthogonal welds in thick box section are much easier to get looking nice 🙂 One day soon I’ll learn to well properly.